3. Step-by-Step Installation Procedure
3.1 Prepare installation media
- Download or copy the installer ISO to a machine with access to the target hardware.
- Write it to a USB drive, or attach it as virtual media through the server's management interface (IPMI/iDRAC/iLO) or hypervisor.
- Set the target machine to boot from that media, in UEFI mode.
3.2 Boot and unattended base install
Booting the ISO starts a fully unattended Debian base install — no prompts, no network access required. It forces the same partition layout on every install, shown below.
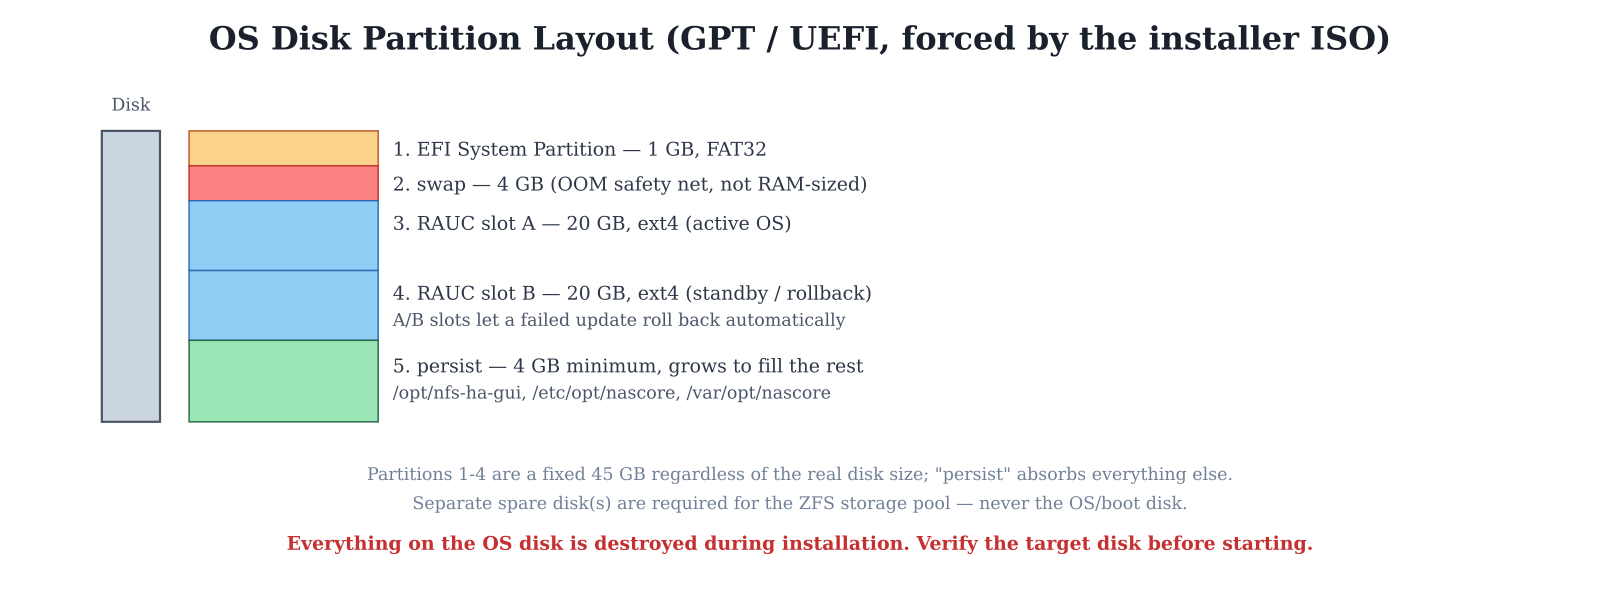 Figure 1 — OS disk partition layout, applied automatically to the selected boot disk.
Warning
Everything already on the target OS disk is destroyed during this step. Double-check which disk is connected as the boot disk before powering on — especially on a hypervisor, where disk ordering can change between boots.
This stage takes roughly 15–20 minutes on typical server-class hardware, then the machine reboots automatically into the freshly installed appliance.
3.3 First boot and the setup wizard
On the very first login (console or SSH) as root, a hook offers to launch the interactive setup wizard automatically:
=== nascore first-boot setup ===
This machine hasn't been configured yet. Run the interactive setup
wizard now? [Y/n]
Accept it (or run it manually later: sudo /opt/nascore-installer/installer/nascore-install.sh
--interactive). The wizard first asks for the install role.
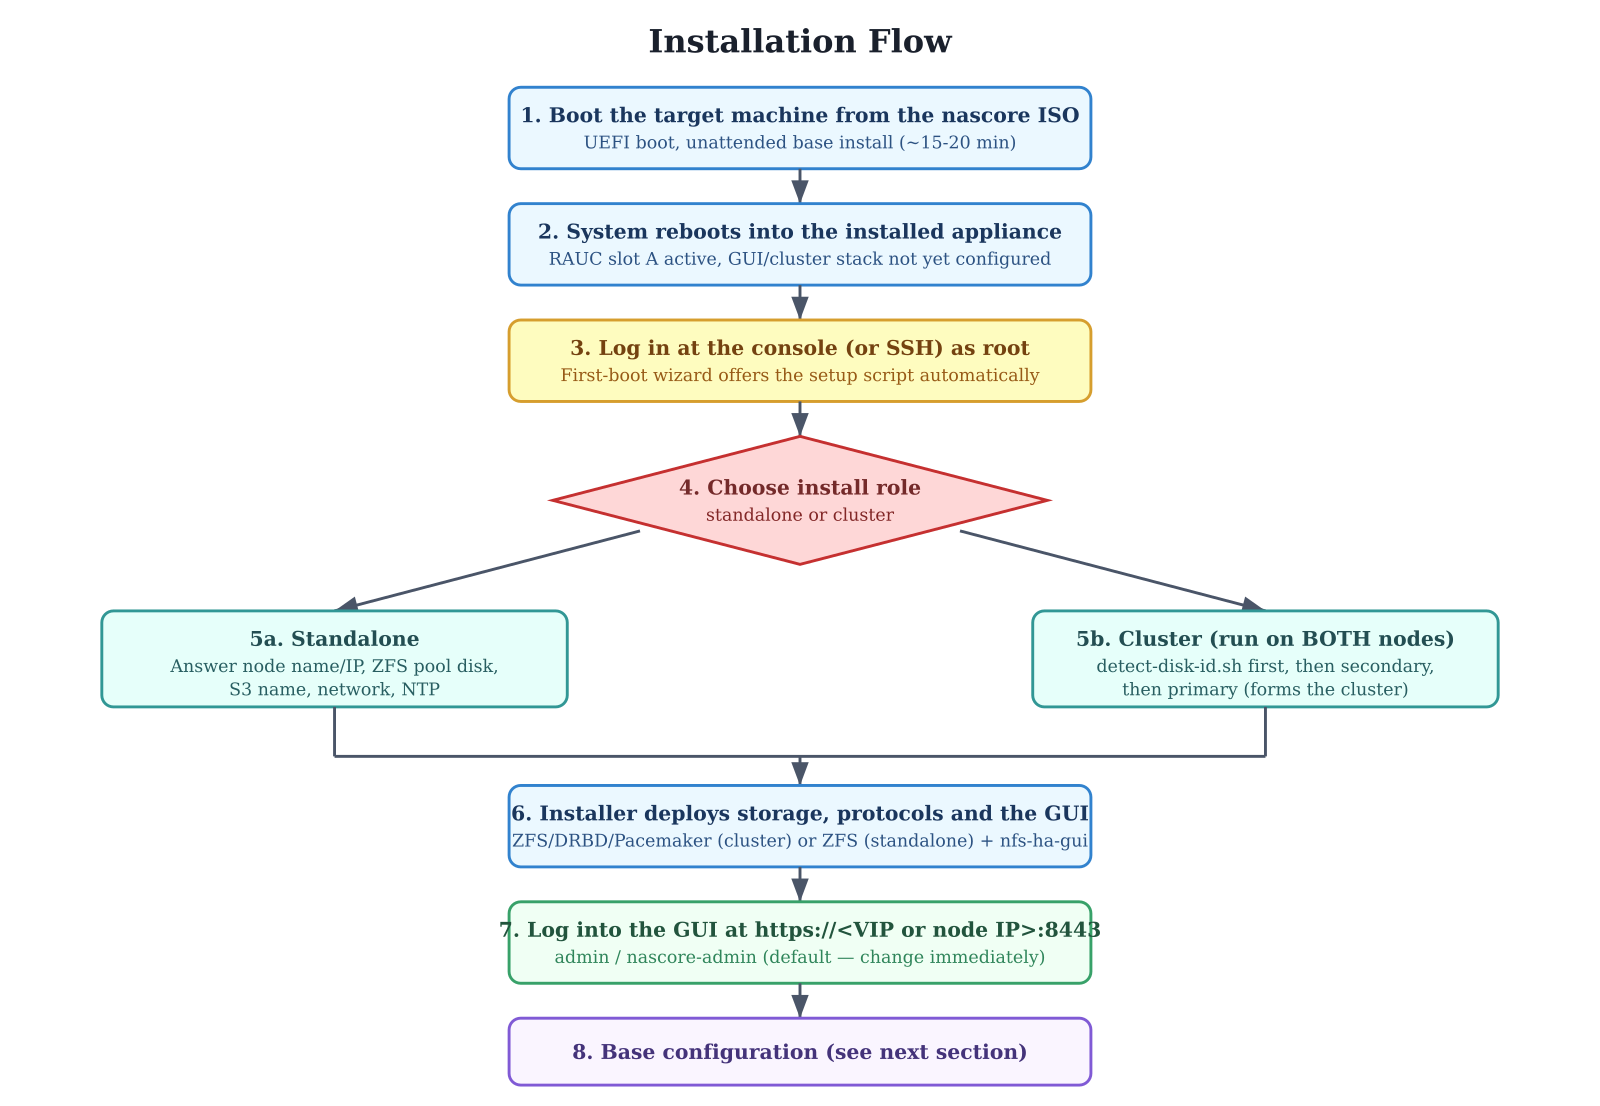 Figure 2 — Overall installation flow, from boot to first GUI login.
3.4 Standalone role
Choose this for a single, non-clustered NAS node. The wizard asks, in order:
| # | Prompt | Format / example |
|---|---|---|
| 1 | This node's hostname | short name, no dots — e.g. nas1 |
| 2 | This node's IP address | plain IPv4, no /prefix — e.g. 192.168.20.190 |
| 3 | Data network NIC(s) for bond0 | space-separated interface names, or empty to keep existing network config |
| 4 | Data network prefix length | e.g. 24 |
| 5 | Default gateway | plain IPv4, optional |
| 6 | DNS server(s) | space-separated plain IPv4, optional |
| 7 | NTP server(s)/pool(s) | space-separated hostnames or IPs, optional — empty keeps the shipped default |
| 8 | Spare block device for the ZFS pool | e.g. /dev/sdb — never the boot disk |
| 9 | ZFS pool name | default: nfs_pool |
| 10 | ZFS ARC max bytes | default: 1073741824 (1 GB) |
| 11 | S3 DNS name | FQDN with dots, must resolve to this node's IP |
The installer then wipes and prepares the storage disk, installs and configures the storage/protocol stack (ZFS, NFS-Ganesha, Samba, rsync, S3), and deploys the management GUI. This takes several more minutes depending on hardware.
3.5 Cluster role — two nodes
Choose this for a highly-available pair. Run the installer once on each node — no third machine or cross-node SSH is used; the two nodes coordinate through Pacemaker's own cluster services once joined.
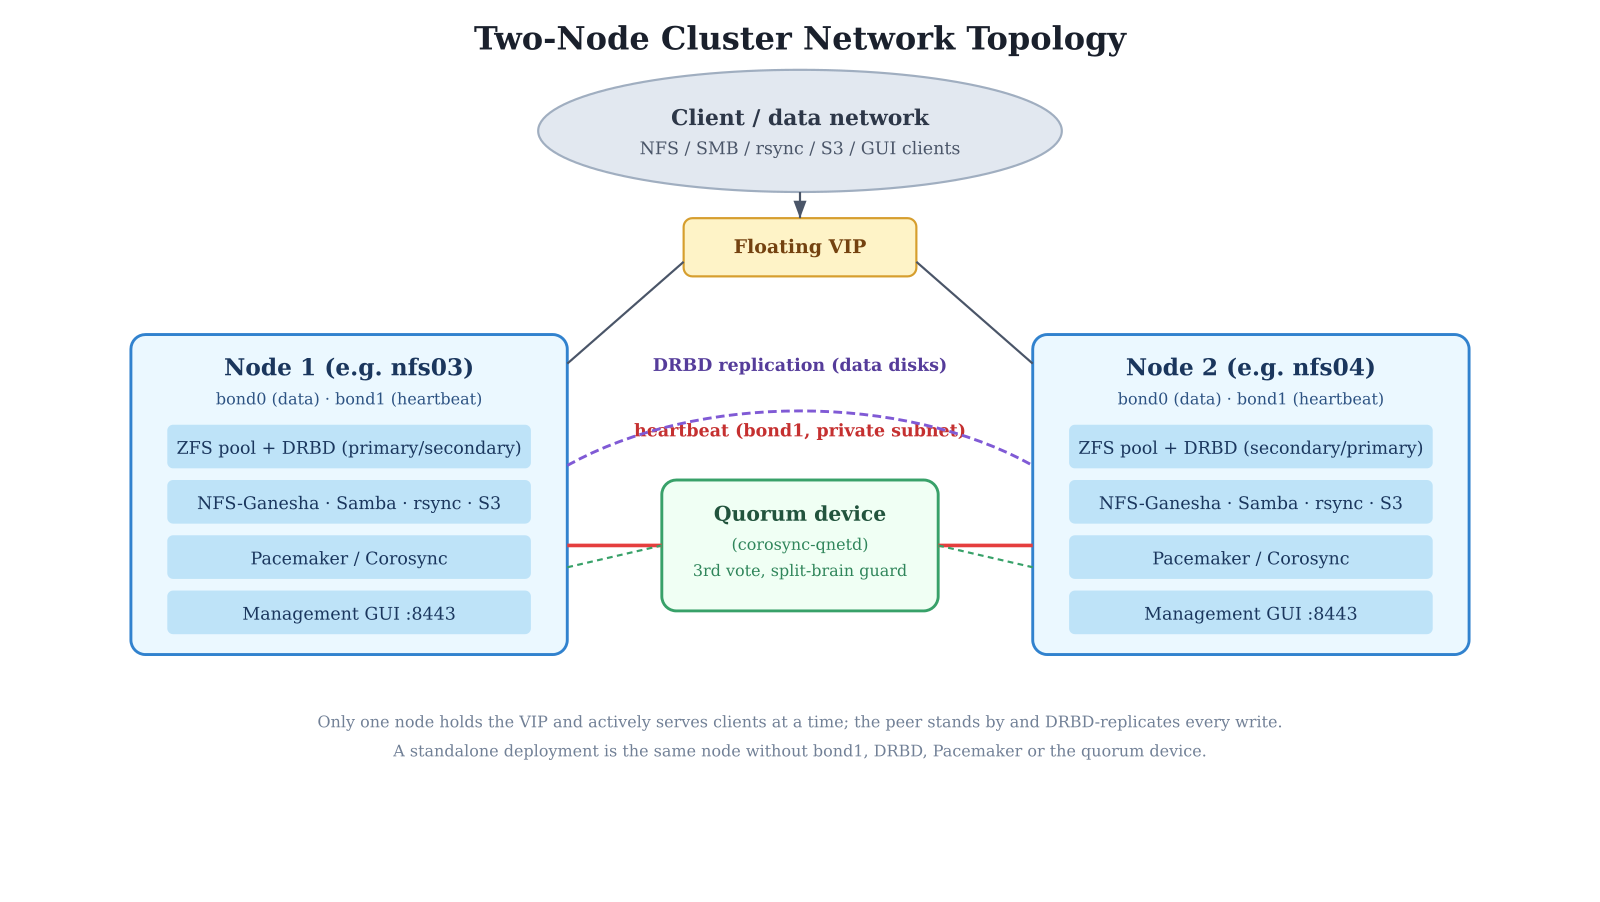 Figure 3 — Two-node cluster network topology (a standalone node is the same picture without
bond1, DRBD, Pacemaker or the quorum device).
Figure 3 — Two-node cluster network topology (a standalone node is the same picture without
bond1, DRBD, Pacemaker or the quorum device).
Step 0 — before running the installer on either node
On both nodes, resolve the stable disk identifier for every data (and, if used, log) disk that will go into the pool — this does not touch the disk and is safe to run any time:
./detect-disk-id.sh /dev/sdb
Note each node's printed /dev/disk/by-id/... path(s) — each node's installer run needs the
OTHER node's values.
Step 1 — run the wizard on the SECONDARY node first
Answers include, in order: cluster role (secondary), this node's hostname/IP, the peer's hostname/IP, both heartbeat IPs and the heartbeat subnet, the same network/NTP prompts as standalone, the data disk(s) and the peer's resolved disk-by-id path(s) from Step 0, a suggested (editable) ZFS vdev layout, an optional SLOG (write log) device, a DRBD shared secret, the pool/cluster names, the S3 DNS name and the cluster (hacluster) password.
This runs Phase A only (packages, disk wipe, DRBD bring-up) and then waits for the primary.
Step 2 — run the wizard on the PRIMARY node
Same prompts as the secondary, plus (primary only): the cluster virtual IP and its prefix length, and the quorum device's IP, hostname and password.
The primary runs Phase A locally, waits for the secondary's cluster service to answer, then forms the cluster, registers the quorum device, creates every Pacemaker resource, and deploys the GUI on both nodes.
Note
Run the secondary before the primary, or in parallel — never run the primary alone first. A partial/failed run is recovered the same way: re-run the secondary, then the primary.
3.6 Unattended (config-file) installation
Both roles can also be driven entirely from a KEY=VALUE configuration file instead of
interactive prompts — useful for scripted or repeated deployments:
./nascore-install.sh --config my-node.conf
See installer/nascore-install.conf.example for every available key, including NTP_SERVERS
for setting NTP sources unattended.
3.7 Completion
Both roles finish by installing the management GUI and creating its first administrator account. The installer prints the URL and default credentials at the end:
GUI:   https://<node IP or VIP>:8443/   (self-signed certificate)
Login: admin / nascore-admin
Warning
nascore-admin is a well-known default password. Change it immediately after the first
login (see Base Configuration) — the platform has no forced-change
mechanism for this account.